
If your anything like me, your feet take a beating outdoors.
They support the full weight of our body… and gear and we expect them to hold up until the end of the hike, hunt or nature walk.
While your tennis or running shoes might feel comfortable on your dawgs, they probably won’t last long, especially on more rugged trails.
You need the correct footwear for the job.
Get the Correct Hiking Shoe for You
With so many hiking shoe brands on the market, how do you choose the right hiking shoe for you?
Here I’ll discuss the questions you can ask yourself when looking for your perfect hiking footwear.
1. How Tall Should They Be?
Your hiking shoes’ height will depend on the terrain you expect to encounter.
Low-Cut
Low-cut shoes provide the least defense against rolling ankles and are more susceptible to trail debris, sand, mud, or grit.
This cut is best if you’re going on well-maintained trails and carrying lighter loads.
Mid-Cut
Mid-cut shoes give better ankle support and more protection from debris. These are best for moderate loads and multi-day trips.
High-Cut
High-cut shoes provide the most balance and support especially on rough terrain, they also keep most debris out.
They usually need some time to properly break-in but are perfect for the most rugged terrain and heavier loads.
2. How Heavy Are They?
The weight of your hiking shoes will depend on how long you’re out on the trail and your level of fitness.
Lighter trail shoes are more comfortable, especially if you’re a novice hiker, but they won’t last long on gnarlier terrain and with heavier loads. More experienced hikers have been known to choose lighter shoes for the freedom of movement they provide.
On the flip side:
Heavy mountaineering boots can handle almost any terrain and load and will provide the most ankle support perfect for novice hikers. However, they can be heavy and require some time to properly break-in.
3. What Material Are They?
The material used in your hiking shoes determines their comfort, weight, water resistance, and durability.
The upper boot material impacts your shoes’ weight, breathability, and durability. It can be made from different leather grains (like full-grain, split-grain, nubuck leather, to synthetics and can have waterproof/breathable membranes for water resistance.
The midsole provides cushioning, buffers your feet from shock, and impacts your boot’s stiffness. This part is usually made of EVA foam or polyurethane for more heavy-duty trips.
Support components in and around the midsole give support. These are often made of lightweight nylon or thermoplastic polyurethane (TPU).
The outsole is the part of your boot that comes into contact with the ground. It’s usually made of rubber but sometimes carbon is added in for harder backpacking or mountaineering boots.
4. How Much Grip Do They Have?
On the topic of outsoles, you have to determine the amount of grip your outsole can provide.
Harder outsoles increase durability but can feel slippy once you go off the beaten path.
Your outsoles’ lugs (the bumps on the outsole) also determine the amount of grip. For backpacking or mountaineering, you’ll want deeper and widely-spaced lugs to easily shed mud.
You also need to take into account how the outsole is connected to the midsole. Adhesives are often used as they’re cheaper than stitching but they’re also in danger of delamination when exposed to high heat for a long time. They should be alright in your car’s trunk or front of a fire or stove, just don’t keep them there for too long.
5. Do They Keep Your Feet Dry?
What will the weather conditions be like on the trail? Will it be wet, dry, hot, cold, or humid? These factors will help you decide on how breathable your hiking shoes should be.
If you’re out on a hot, dry, desert trail, you may want a more breathable hiking shoe that lets humidity evaporate from your feet and lets air flow in to keep them cool.
If you’re frequently in and out of the water on your trail, you need to decide whether you prefer a quick-drying shoe or a waterproof boot.
Remember that a boot with a waterproof laminate can keep raindrops from entering but it can make your feet feel hot and moist due to its lack of breathability.
This is why it’s important to choose the right hiking socks (which we’ll discuss below).
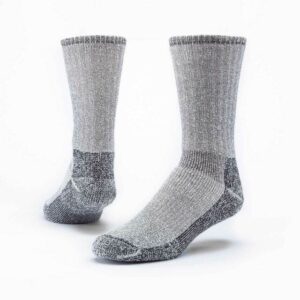
6. Do They Go Well With Your Socks?
Footwear doesn’t just mean shoes but socks as well.
Make sure you’re using the same socks you’re planning to wear under your shoes while out on the trail.
Do your shoes feel comfortable with the socks? Do you need to buy different socks that combine well with your shoes?
Finding the right socks to wear with your hiking shoes can provide a more comfortable experience at the end of the hike.
7. How Do They Fit and Feel?
Perhaps the most important factor in choosing footwear is how comfortable they feel when you put them on. Do they fit you well?
The length should allow your toes to wiggle but not too long that they cause you to stumble on the slightest of bumps. Getting the right shoe length requires special care when you have hammertoes or neuroma.
The width shouldn’t be too tight to restrict circulation but not too loose where your feet can slide freely.
Your foot’s bulk should all fit inside the boot. Failure to get the right volume may result in your boot gradually deforming to one side.
Make sure to spend some time walking in the shoes before buying them. This should give you an idea of how the shoes feel while you’re moving. This is the perfect opportunity to inspect how the boot parts move and whether there are parts that jut in or pinch your foot in certain places.
If after all of that and the shoes feel fine, you’ve got yourself your perfect hiking shoes.
You may then want to remember what brand and dimensions it has in case you need to shop online for another hiking shoe eventually.
Upper Boot Materials
Materials impact a boot’s weight, breathability, durability and water resistance.
Full-grain leather: Excellent durability and abrasion resistance; plus very good water resistance. Most commonly used in backpacking boots built for extended trips, heavy loads and rugged terrain. Not as light or breathable as nylon/split-grain leather combinations. Ample break-in time is needed before starting an extended trip.
Split-grain leather: Usually paired with nylon or nylon mesh to offer lightweight, breathable comfort. Split-grain leather “splits away” the rougher inner part of the cowhide from the smooth exterior. Benefit: Lower cost. The downside: less resistance to water and abrasion (though many feature waterproof liners).
Nubuck leather: Full-grain leather that has been buffed to resemble suede. It is very durable and resists water and abrasion. Fairly flexible, yet it also requires ample time to break in before an extended hike.
Synthetics: Polyester, nylon and so-called “synthetic leather” are all commonly found in modern boots. They are lighter than leather, break in more quickly, dry faster and usually cost less. Downside: They may show wear sooner due to more stitching on the outside of the boot.
Waterproof linings: Boots billed as “waterproof” feature uppers constructed with waterproof/breathable membranes (such as Gore-Tex® or eVent®). They work well to keep feet dry in wet conditions. Downside: The reduced breathability created by a membrane (compared to the ventilating mesh used on some nonwaterproof shoes) may cause feet to feel warm on dry summer days. Tip: The leather on these boots should be still treated with a waterproofing product like Nikwax to keep dust and dirt from impacting the waterproof linings.
Different boot fabrics can deliver very similar performance. Personal preference is often the final factor when a decision is reached. It’s usually a good idea to trust your gut instincts.
8. MIDSOLE MATERIALS
Sandwiched between a boot’s upper and its traction-giving outsole is the midsole, which provides cushioning, buffers feet from shock and largely determines a boot’s stiffness. The most common materials are EVA (ethylene vinyl acetate) and polyurethane. EVA is a bit cushier, lighter and less expensive. Midsoles use varying densities of EVA to provide firmer support where needed (e.g., around the forefoot). Polyurethane is generally firmer and more durable, so it’s usually found in extended backpacking and mountaineering boots.
9. SUPPORT COMPONENTS
A variety of components are used in and around the midsole to lessen shock and provide support.
Shanks: These 3-5mm thick inserts are sandwiched between a boot’s midsole and outsole to add load-bearing stiffness to the midsole. Most are made of lightweight nylon or thermoplastic polyurethane (TPU). They vary in size; some cover the entire length of the midsole.
Plates: These thin, semiflexible inserts are positioned between the midsole and the outsole, and below the shank (if included). They protect feet from getting bruised by roots or uneven rocks.
10. OUTSOLES
Rubber is used on all hiking boot outsoles, with Vibram rubber the best-known brand name. Additives such as carbon are sometimes added to backpacking or mountaineering boots to boost hardness. Hard outsoles increase durability but can feel slick if go you off-trail.
Other outsole considerations
Lug pattern: Lugs are traction-giving bumps on the outsole. Deeper, thicker lugs are used on backpacking and mountaineering boots to improve grip. Widely spaced lugs offer good traction and shed mud more easily.
Heel brake: This refers to the clearly defined heel zone that is distinct from the forefoot and arch. It reduces your chance of sliding during steep descents.
11. CONNECTING THE UPPER AND OUTSOLE
The outsoles of hiking boots are typically bonded to the midsole and upper with an adhesive. Faster and less expensive than stitching, the use of adhesives creates a durable bond. Just be aware: High heat is the enemy of adhesives. Do not store footwear in a hot car trunk or attic for extended periods or dry boots in front of a fire or woodstove. Doing so can cause the outsole, midsole or upper to delaminate.
12. Hiking Footwear Brands
Found on some waterproof/breathable boots, a rand is the wide rubber wrap encircling the boot (or sometimes just the toe area) where the upper meets the midsole. It offers extra defense against water penetration on wet, mucky trails. It also protects boot leather from rocks and abrasion.
13. SOME TIPS FOR SHOPPING IN PERSON
- Prepare for hiking boot shopping
Visit a store when you can devote some extended time to the boot-selection process. Later in the day is often good, since feet are prone to swell slightly as a day progresses.
Bring in any inserts or orthotics that you typically wear plus a favorite pair of socks. Wearing familiar socks can help you more quickly assess the fit and feel of new footwear.
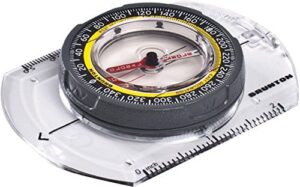
- Observe your sockless foot
What are its characteristics? A Brannock foot-measuring device can gauge your foot’s length and width, but think beyond those dimensions. For example, if you can see the bones and veins in your feet, you probably have what is known as a low-volume foot. If your foot has some softness and roundness to it, it’s likely yours is a high-volume foot. If you can slide a finger under the arch of your foot you probably have a medium to high arch. And you probably have a flat foot if you can’t slip your finger under the arch. If you have a bunion, you’ll likely need a wider shoe.
- Try on 3 potentially suitable pairs of boots
Work with your sales specialist to select 3 pairs of boots that have the potential to work for you. If you have wide or high-volume feet, Keen boots are very popular and are worth consideration. The European brands—Asolo, Salomon, Zamberlan and Lowa—are often well suited for the individual with a slender, narrow foot. If the first 3 pairs don’t work, ask for another round. Keep at it until you have a couple of boots that might work.
First impressions matter:
Do your toes or sides of your feet feel squished? If so, the width is likely too narrow.
Do your heels stay in place when you take a step? If not, check the lacing.
Do you feel any pinching? Check to make sure your socks fit smoothly.
Ideally, wear trail socks you have worn previously, socks that feel familiar to you. You want to be able to focus on the feel of the new shoe or boot.
- Spend some time in each boot
Does your heel stay in place as you walk uphill? If not, adjust the tension of your laces atop the instep and try the incline again. Do your feet slide forward as you walk downhill? (If so, the boot may be too high in volume or the laces too loose.) Do your toes feel crammed as you walk down a decline? (The boot may be too narrow or, again, too high in volume.) You should not be able to feel your toes hitting the end of the toebox. You want just enough room to be able to wiggle your toes.
It may be hard to determine all these answers perfectly during a relatively short store visit, but these moments should provide telltale clues if a shoe is not exactly right. If you detect an odd bump or seam, or a little pinching in the forefoot, the boot’s not right.
If, however, a boot feels like a winner, take it home and wear it around the clean confines of your home’s interior for several hours. If the boot still feels comfortable, you’ve made a good choice. That’s the goal: to find boots that fit like a dream.
14. TIPS FOR ONLINE FOOTWEAR SHOPPING
Consider choosing a brand you have worn before and liked. Most boot companies tend to use a consistent foot model over time, so the fit is likely to be similar.
Try on 3 potentially suitable pairs of boots; send back what doesn’t work.
Know your size. It’s best to have your foot measured on a Brannock device. You can also measure your foot length (in inches or centimeters) and use the online sizing charts found on the boot page to find your shoe size. If this is not feasible, then base your size on your past shoe-shopping history.
As we recommend for in-store shoppers, wear your chosen footwear in the clean surroundings of your home for several hours. Go up and down stairs, if possible, to check for fit and comfort. Adjust laces as needed.

About the Author
I'm David, Founding Nomad of AdventureHacks, Inc. My mission is to inspire adventure on the ground, in the water and through the air. If I also happen to inspire you to purchase gear, my team and I plant a tree in its native environment for every order.


read some of your other articles and am additcted to hiking barefoot now
would like to see more manufactured in the usa. been wearing new balance lately, seem to take a beating on the trails
quality of trail shoes seem to be diminishing. i cannot get anything to last more than 90 days anymore
I used to always wear high cut boots, but now go for low cut trail runners. I can throw gaiters on if I need to, and haven’t had any issues with rolling my ankle. But I am not doing nearly as much overnight backpacking as I used to.
Hiking barefoot was never a thing for me until I read your articles on hiking. Thanks for the ideas and guides, they really helped me understand hiking very well.
Mid-cuts are the sweet spot for almost everyone. Unless you’re doing serious mountaineering, high-cuts are just overkill and heavy as hell.